
Overview
Magento 2.4.4 is finally here with improved functionalities, performance enhancements, and plenty of minor bug fixes. On April 12, 2022, Adobe officially released the latest Magento 2.4.4 version. The latest release of Magento has come up with some of the exciting features and improvements for the store owners and developers. In this blog, we will guide you to install Magento 2.4.4. by following the instructions step by step.
The following are the steps:
- Install Xampp & Composer Software's
- Install Elastic search & Windows OS
- Enable PHP Extension & Configure php.ini
- Create Database for Magento 2
- Create Database for Magento 2
Before starting the installation, you can check the system requirement for installing Magento.
Software Required:
- Xampp-windows-x64-8.1.4-1-VS16-installer
- Composer 2.3.5
- Elasticsearch-7.16.3-windows-x86_64
- magento-ce-2.4.4_sample_data-2022-03-16-05-13-02
System Configuration:
- Windows 64-bit OS 10 or Above
- Minimum 8GB RAM
- Hard Disk as Per Storage
- Processor i3 and above
Step 1: Install Xampp and Composer Software's
Our first step to install Xampp as it has PHP, MySQL, Apache installed in it. These are required to have Magento2 setup on Windows.
Download Xampp here: https://www.apachefriends.org/xampp-files/8.1.4/xampp-windows-x64-8.1.4-1-VS16-installer.exe
Run set up file and proceed with all steps to install Xampp. In Select Components step, make sure to select Mysql and PHP, PHPmyadmin.

Now open XAMPP and start Apache and Mysql, green color of Apache and MySQL indicates that its been started successfully.

COMPOSER:
Composer is a library management tool in PHP (Dependency Management), this tool saves us a lot of time with the necessary packages that your project needs to use, you just need to declare it, Composer will automatically download the code of the libraries through a community server
Download Composer Windows version here: https://getcomposer.org/Composer-Setup.exe
Select the php.exe file of php version 8.1

Step 2: Install Elasticsearch on windows OS
Elasticsearch is now a required application to install Magento 2.4. During installation process, the system will verify if Eleasticsearch was installed and configured properly. If there’s something wrong with Elasticsearch verification, the installation process will stop.
Next, unzip archived file at the “E:\xampp\htdocs\” as shown below and go to \elasticsearch-7.16.3\bin
Right click on elasticsearch.bat and select run as administrator
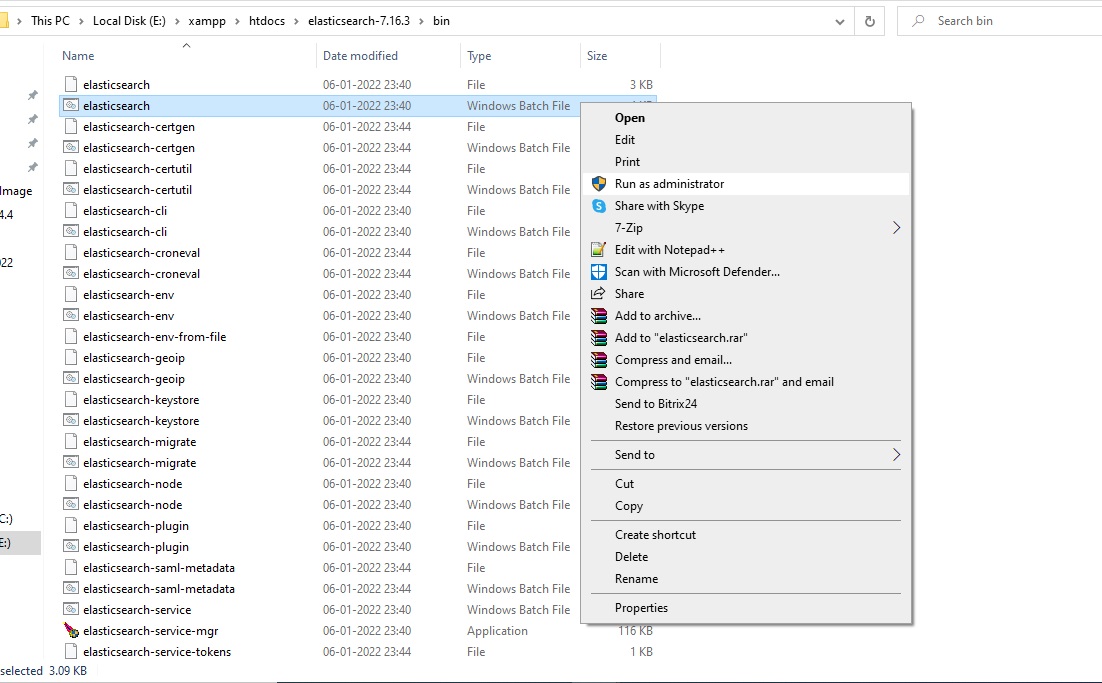
Download Elasticsearch for Windows here: https://artifacts.elastic.co/downloads/elasticsearch/elasticsearch-7.16.3-windows-x86_64.zip
To check if Elasticsearch is running on your system, in your browser type: localhost:9200
If you see this result page => Elasticsearch is running properly

Step 3: Enable PHP extensions & Configure php.ini
Enable required PHP extensions:
Quick tip: You can quickly open php.ini on Xampp interface with this button
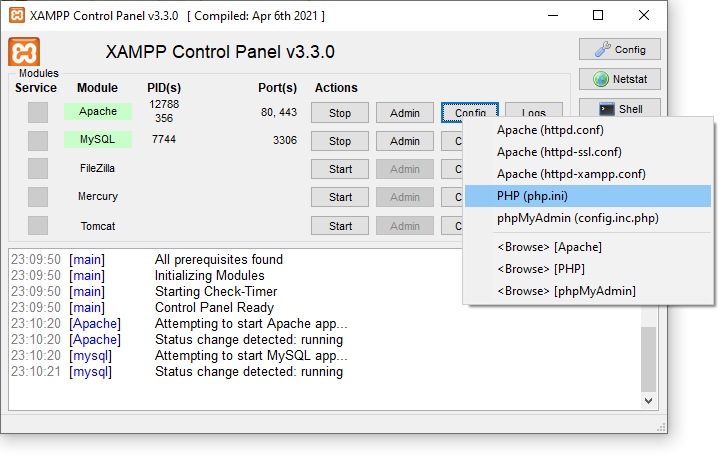
[PHP]
;extension=gd
;extension=intl
;extension=soap
;extension=xsl
;extension=sockets
;extension=sodium
Remove ; from the above lines of php.ini file. Save the file.
Configure PHP settings:
max_execution_time=18000
max_input_time=1800
memory_limit=4G
Finally, restart apache to apply php settings by click on apache Stop and Start button on XAMPP

Step 4: Create database for Magento 2
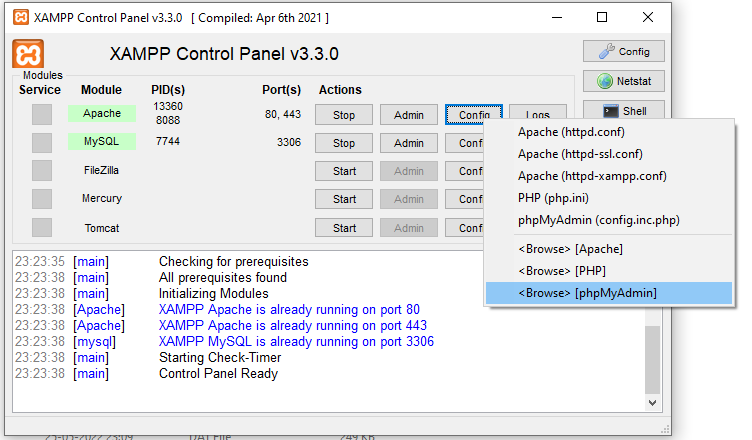
In Xampp interface, open PHPmyadmin by clicking on Admin button to open phpmyadmin
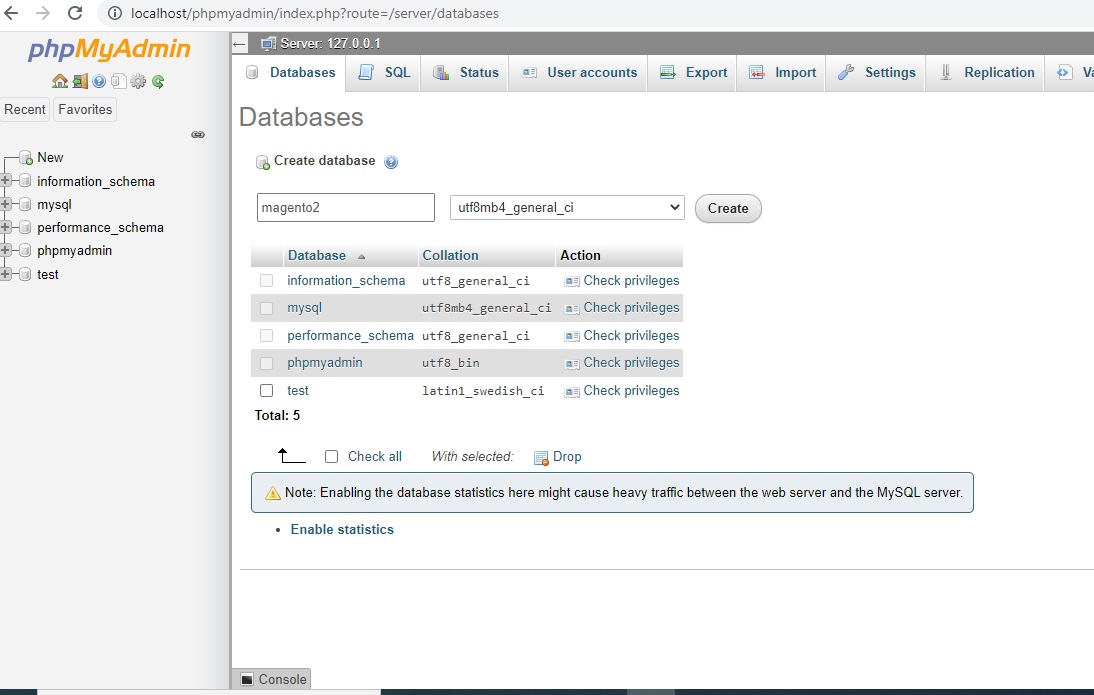
On phpmyadmin page, click on New => type database name => click on Create to create a new database. For example, I create magento2 database here
Step 5: Install Magento 2.4.4
Create folder magento in E:\xampp\htdocs and unzip this archived file into a folder E:\xampp\htdocs\magento
First download Magento 2 with sample data here: https://magento.com/tech-resources/download
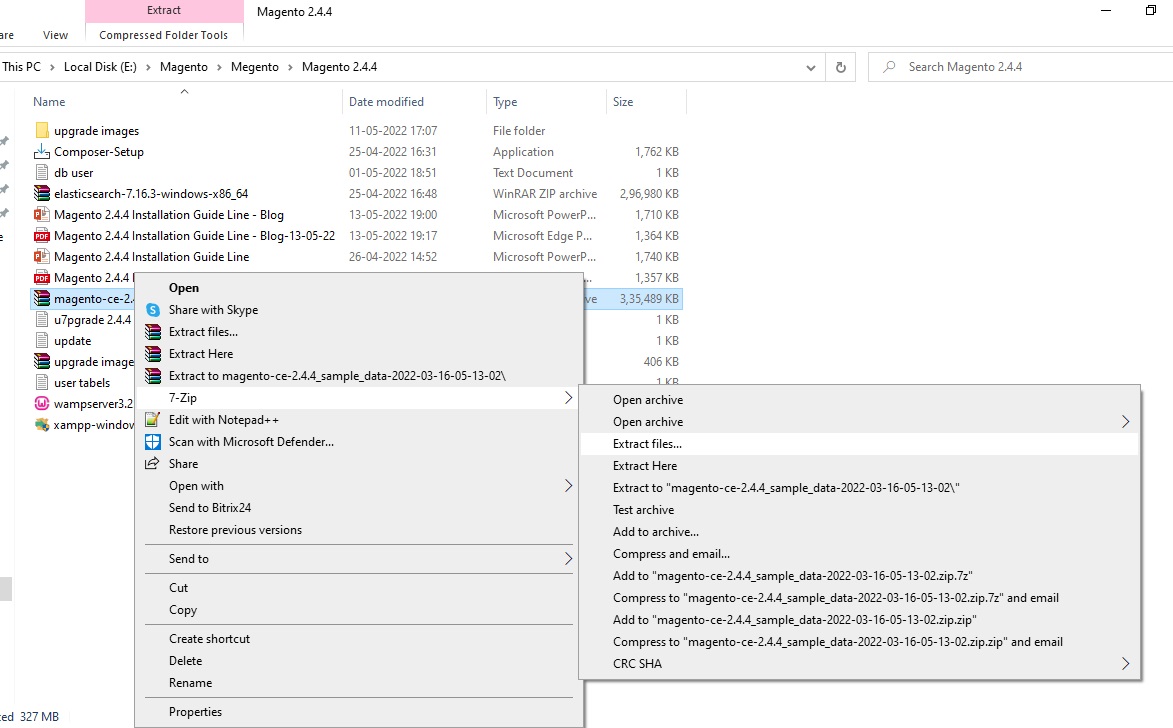
Server Configuration:
The Magento is served from magento2/pub folder. The rest of the Magento file system is vulnerable because it is accessible from a browser. Setting the webroot to the pub/ directory prevents site visitors from accessing sensitive areas of the Magento file system from a browser.
We need to set document root to pub, to do this go to file E:\xampp\apache\conf\extra\httpd-vhosts.conf
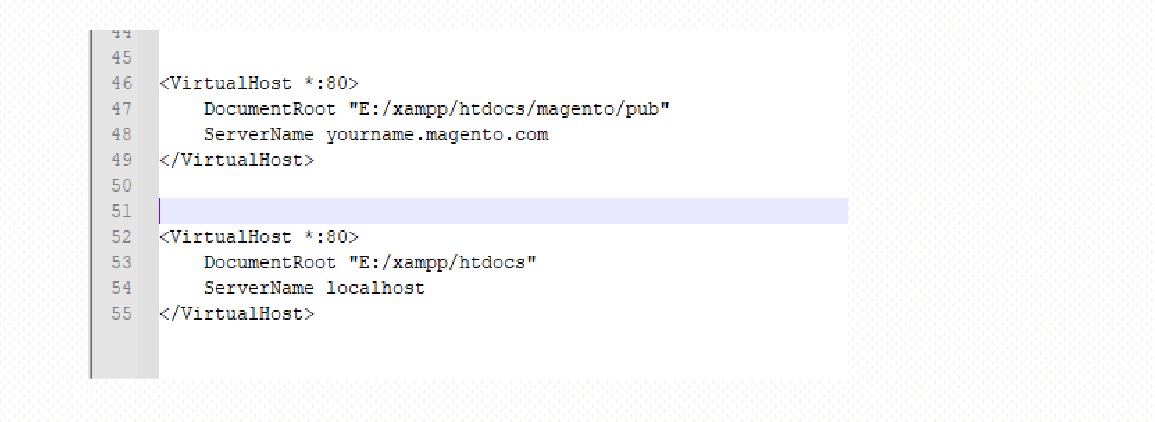
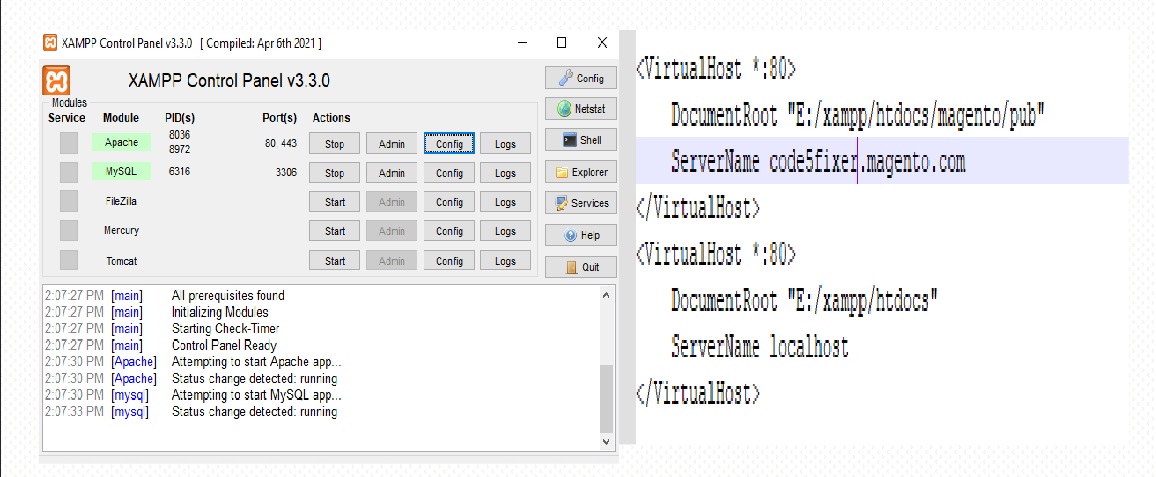
DocumentRoot "E:/xampp/htdocs/magento2/pub"=> location of the magento2 folder path yourname.magento.com – this is the base url which you can set as per your wish. Ex: – code5fixer.magento.com
Open notepad with “Run as administrator”.

Open C:\Windows\System32\drivers\etc\hosts file in notepad and add the below line at the bottom of the file.
127.0.0.1 yourname.magento.com
Restart apache to apply PHP settings by click on apache Stop and Start button on XAMPP

Now insert this command to start installing Magento 2 (make sure Elasticsearch, Apache, Mysql all are running before execute this command)

Open the command prompt, type below commands:
C:\Users\Username>e:
E:\>cd E:\xampp\htdocs\magento
E:\xampp\htdocs\magento>
php bin/magento setup:install --base-url="http://yourname.magento.com/" --db-host="localhost"
--db- name="magento2" --db-user="root" --db-password="" -- admin-firstname="admin" --admin-lastname="admin"
 --admin- email="user@example.com" --admin-user="admin" --admin- password="Admin@123456" --language
="en_US" --currency="USD" -- timezone="America/Chicago" --use-rewrites="1" --backend-frontname="admin"
 -- search-engine=elasticsearch7 --elasticsearch host="localhost" --elasticsearch- port=9200
Replace these values:
- base-url: your magento 2 installation folder
- db-name: your database name in step 3
- db-password: your database password in step 3

Now if everything is done properly, Composer will start to install Magento 2.
If you get the following error, then follow the given solution below Error :
In PatchApplier.php line 170:
Unable to apply data patch Magento\Theme\Setup\Patch\Data\RegisterThemes for module Magento_Theme. Original exception message: Wrong file In Gd2.php line 72: Wrong file

Solution:
Here Image Adapter try opens to image files (‘open function in Gd2.php line 72). Validate URL Scheme function return false always because it checking ‘URL’ format but local files not valid for this format, so it returns false.
Find validate URL Scheme function in vendor\magento\framework\Image\Adapter\Gd2.php file. at line 92. Replace function with this:
private function validateURLScheme(string $filename) : bool
{
          $allowed_schemes = ['ftp', 'ftps', 'http', 'https'];
          $url = parse_url($filename);
          if ($url && isset($url['scheme']) && !in_array($url['scheme'], $allowed_schemes) && !file_exists($filename)) {
              return false;
          }

          return true;
}
Only change is && !file_exists($filename text added at line 96.
Save the file and again run the magento2 install command in the command prompt.

Copy E:\xampp\php\libsodium.dll to E:\xampp\apache\bin\
Restart Apache means stop and start Apache.
Now if you go to your browser with this URL to access Magento 2 store: http://yourname.magento.com(In my machine, I have setup to http://code5fixer.magento.com/) .You will probably see page like this
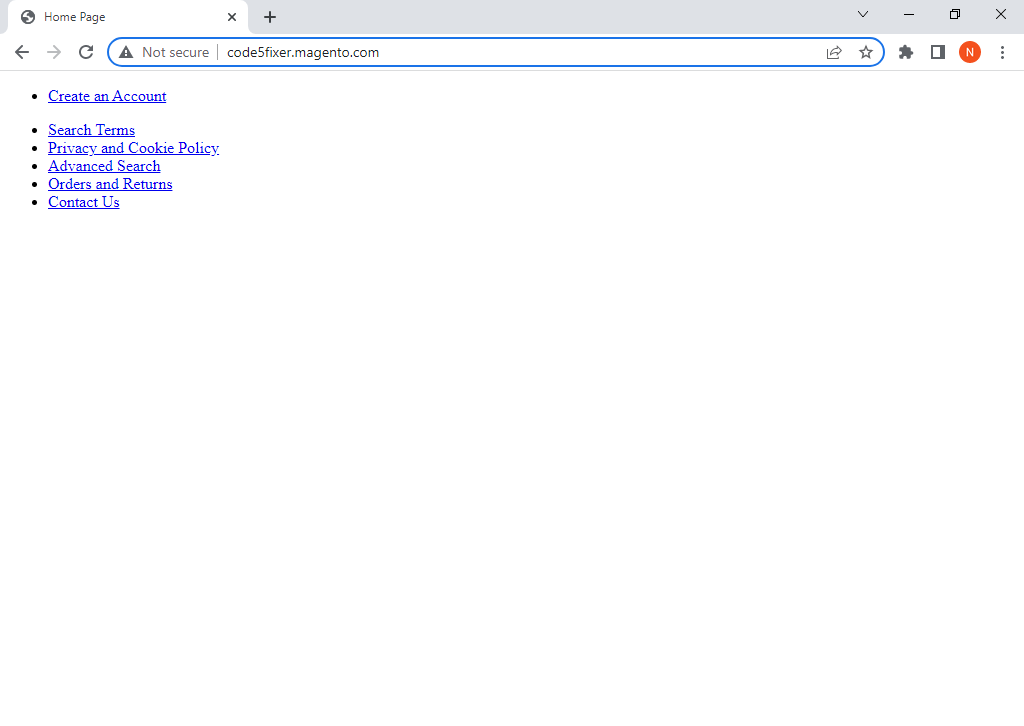
Go to: E:\xampp\htdocs\magento2\vendor\magento\framework\View\Element\Template\File
Edit Validator.php using a text editor and find this line:
if (0 === strpos($realPath, $directory)) {
Use
if (0 === strpos($path, $directory)) {
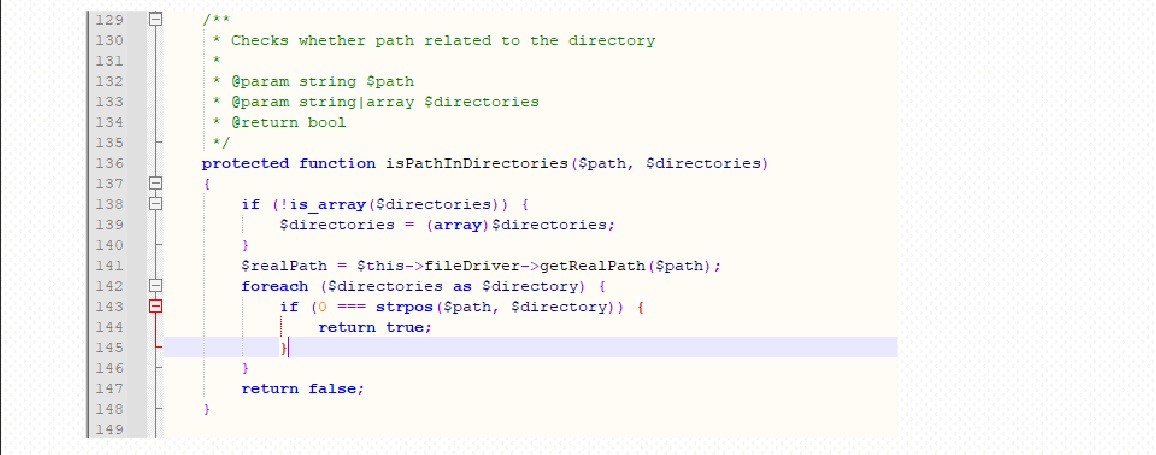
Save the File.
Next, you will need to run these command to upgrade the database and deploy static view files
php bin/magento setup:upgrade php bin/magento setup:di:compile php bin/magento setup:static-content:deploy -f php bin/magento indexer:reindex php bin/magento cache:flush
Once command finished, reload your website and you will see the your new Magento 2 website on localhost.
This is Magento 2 Home page without sample data.
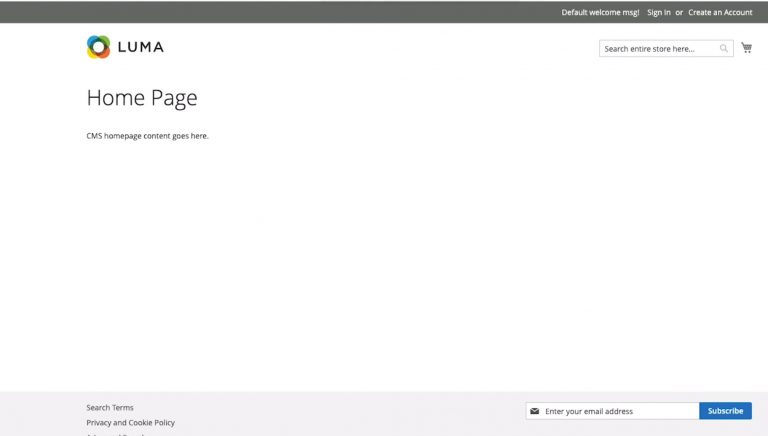
This is Magento 2 Home page with the sample data.

Admin login :
Your Admin Url – http://yourname.magento.com/admin/
When logging to admin dashboard with username – admin and password –Admin@123456(which we set in magento install command), you may see this error

To fix this issue, open Magento 2 Command prompt and run this command
php bin/magento module:disable Magento_TwoFactorAuth
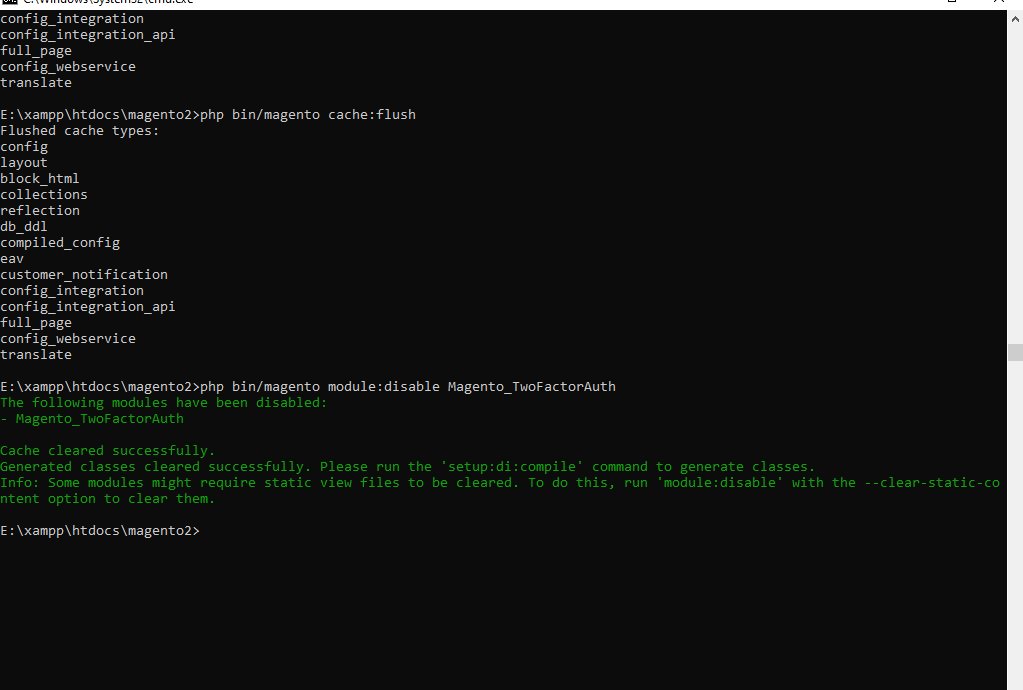
Now refresh admin page and you will be able to log in to admin dashboard normally.


Comments